Email Registration Application
Let us create a small web application which will allow is to take input from the user using the wizard control.
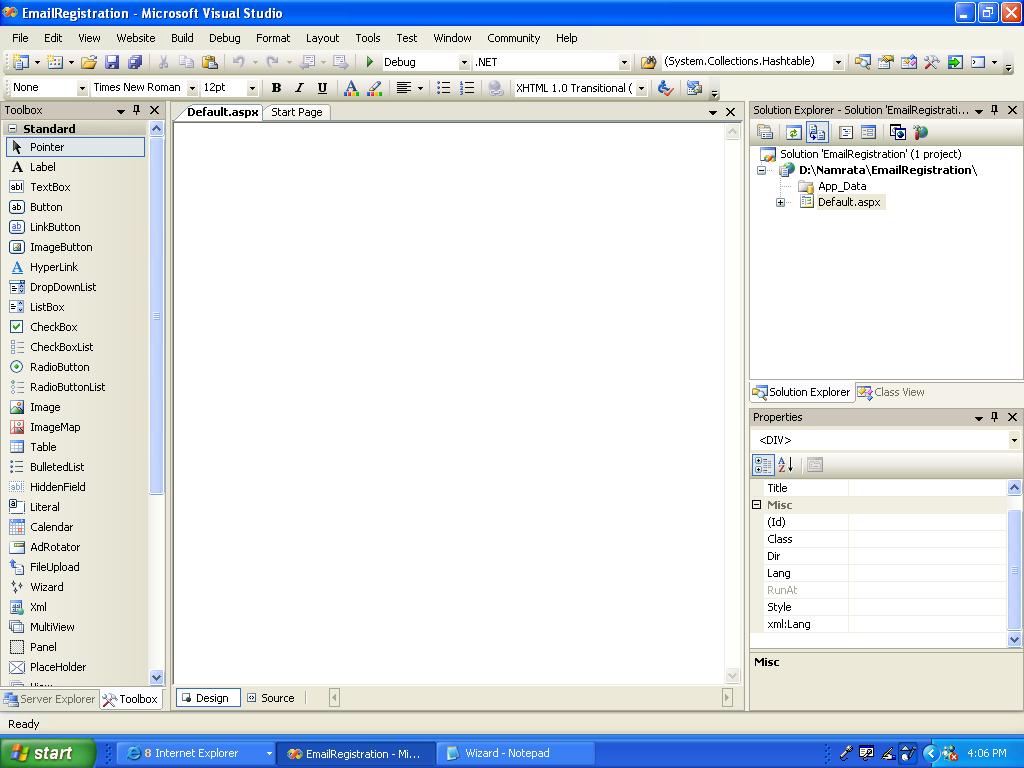
1. Open a new web site project as shown below.
2. Add a wizard control to the project from the toolbox and name it
as EmailRegWizard. By default you will notice there are 2 steps in the
wizard.
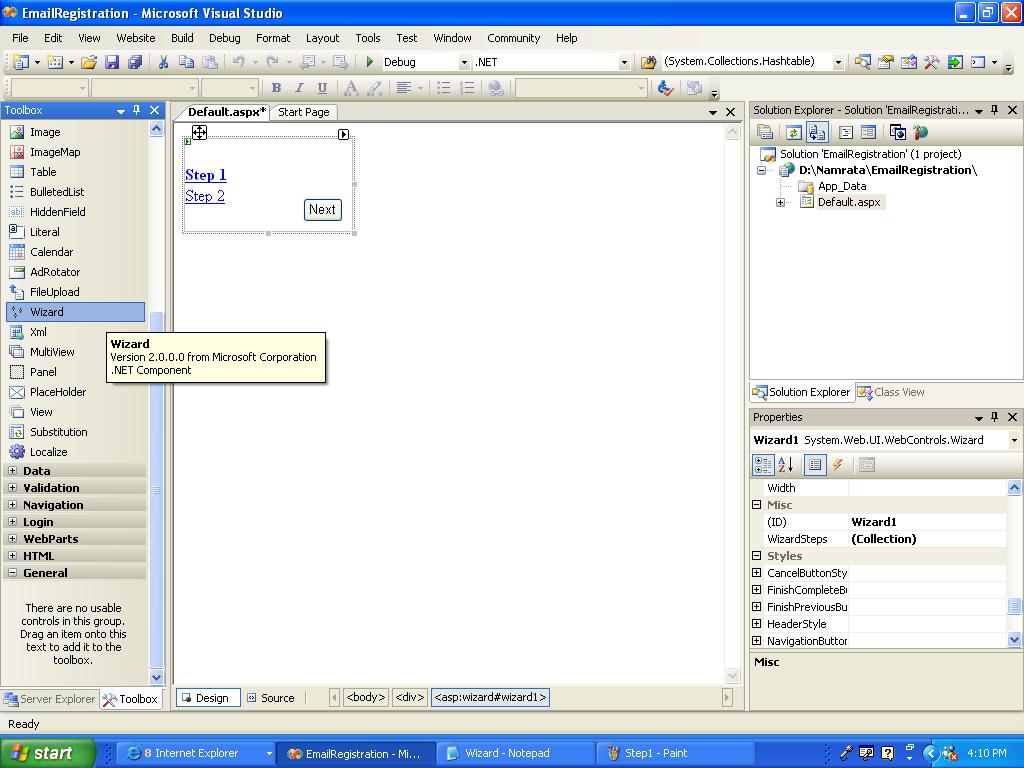
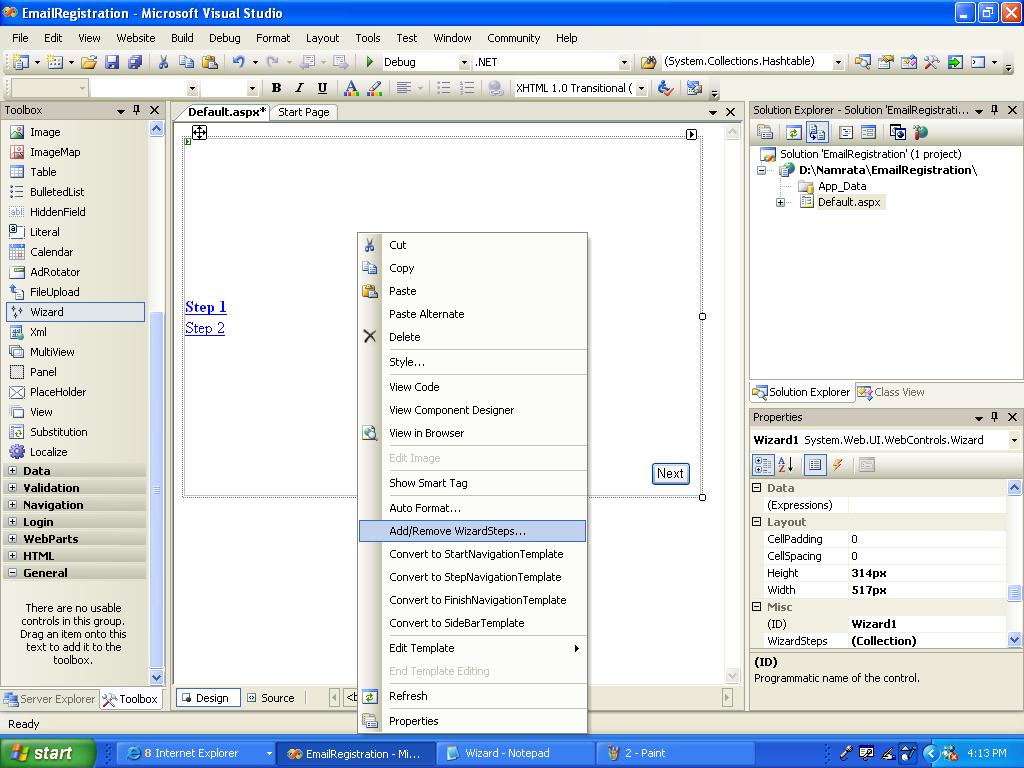
3.Increase the size of the wizard control as shown below. We will now
add 3 more steps to the wizard control. To add steps to the wizard
control let us select the wizard control, right click and select
Add\Remove Wizard Steps.
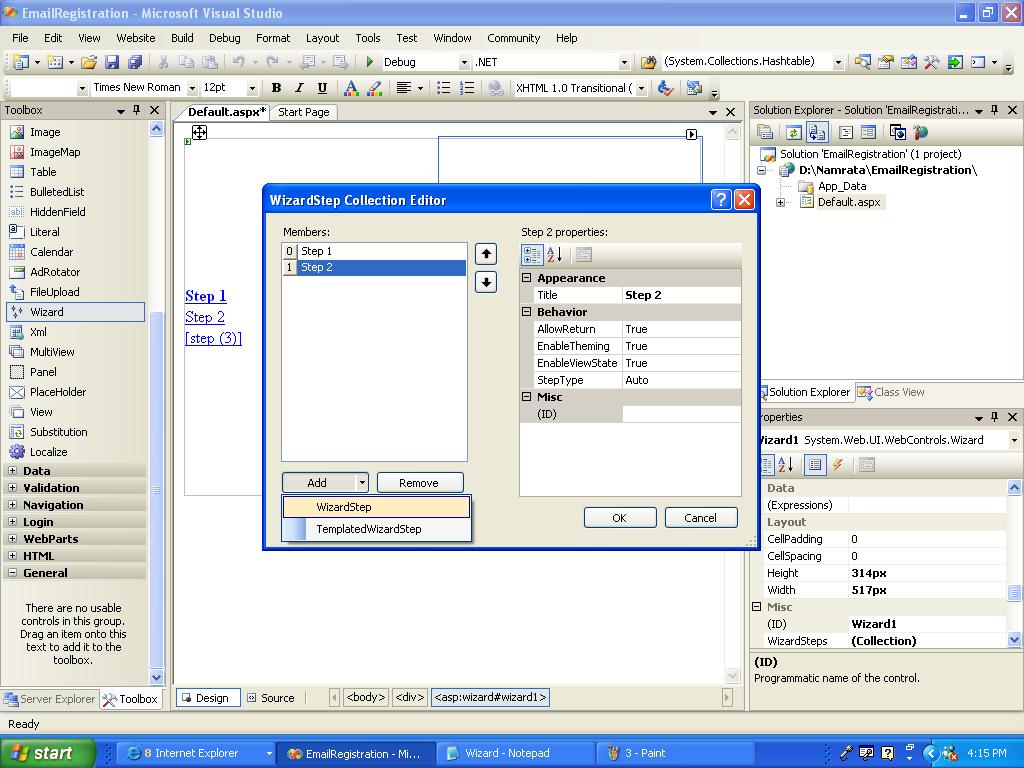
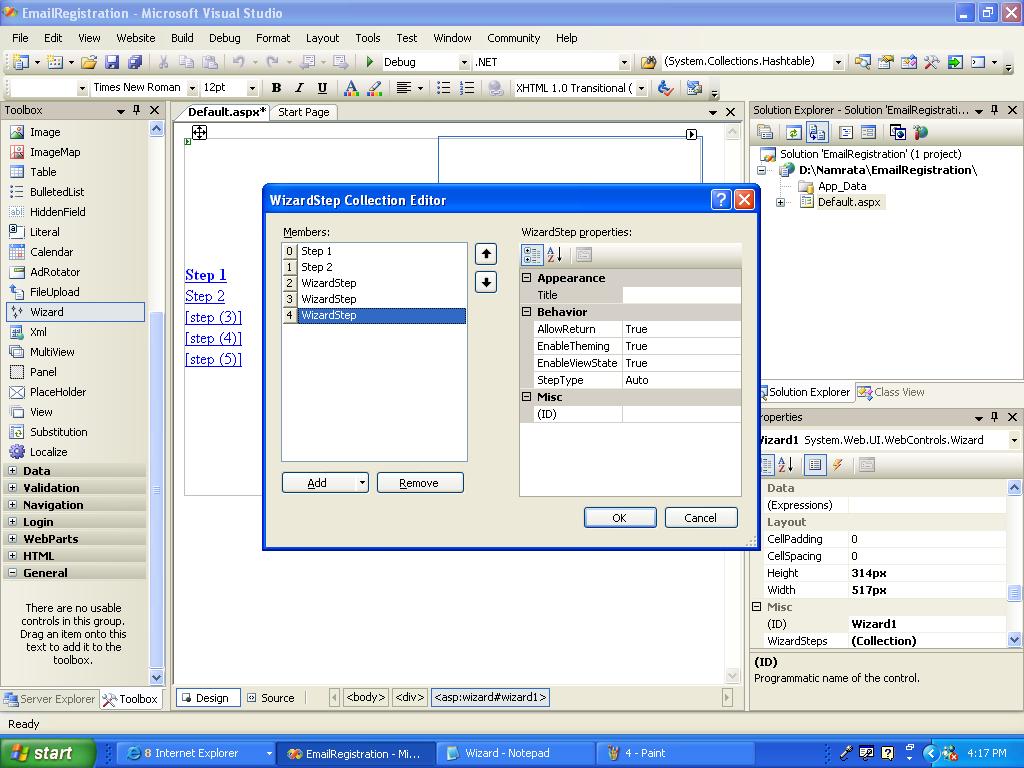
4. WizardStep Collection Editor will be launched. Click on Add and
select WizardStep. (If you click on add directly a wizard will be
added).Add 2 more steps to the wizard control as shown below. Totally
you should have 5 steps in the wizard as shown below.
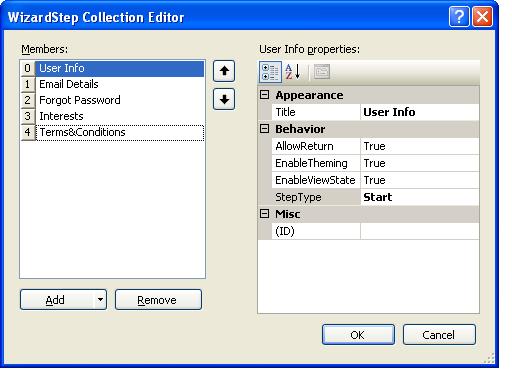
5.Let us now rename each step of the wizard control depending on the activity that we are going to perform in that step.
In the first step we will take the basic user information,the second
step wll address details for email, third step will address the details
for forgot password, in the fourth step we will ask users about their
interests and 5th is the final step in which the user will have to
accept the various terms and conditions. Now let us rename each of these
steps as follows (as shown below):
Step 1 -- User Info
Step 2 -- Email Details
Step 3 -- Forgot Password
Step 4 -- Interests
Step 5 -- Terms&Conditions
Step 2 -- Email Details
Step 3 -- Forgot Password
Step 4 -- Interests
Step 5 -- Terms&Conditions

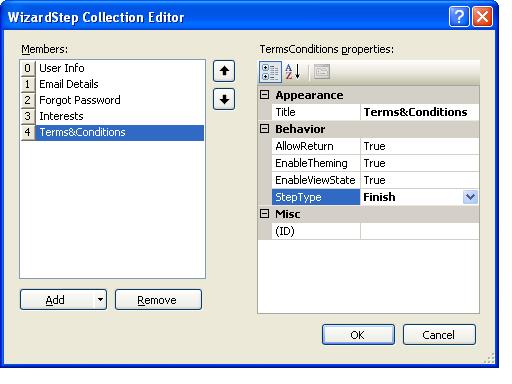
6. For the first step let us set the StepType to "Start" and for the
last step let us set the step type to "Finish". After setting the step
type click on "OK".
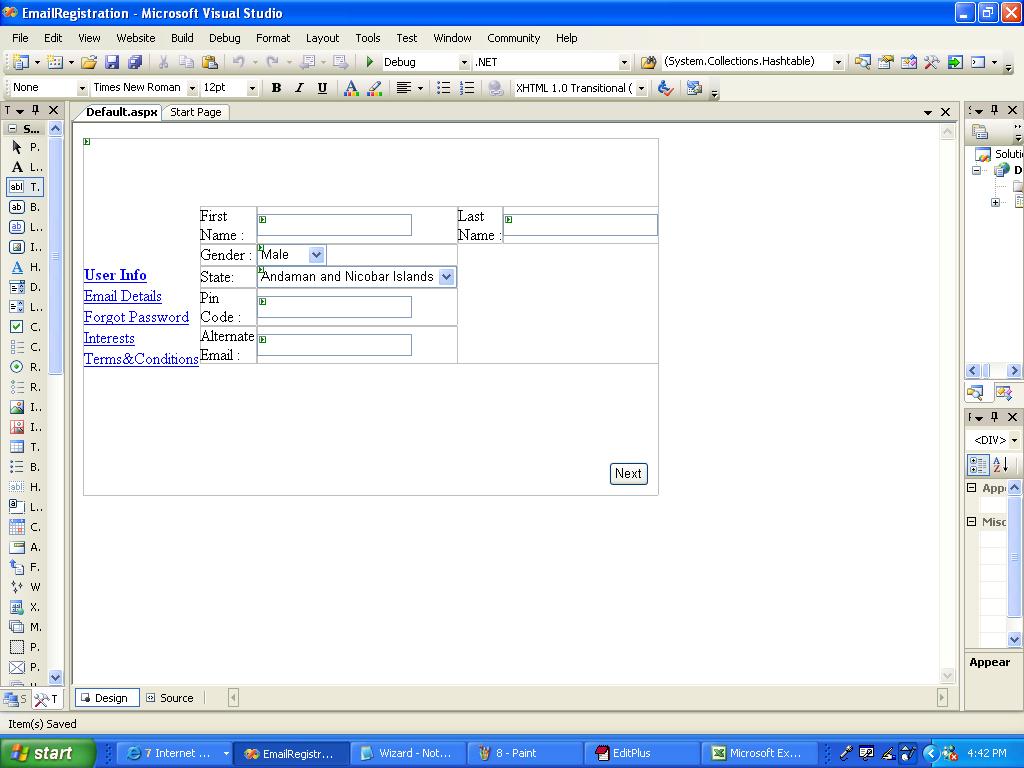
7. now let us add some controls for each step. For the first step we
will add the basic user details like firstname, lastname. Gender, State,
PinCode ,Alternate Email Address. Please refer to the below image and
code.
<asp:WizardStep runat="server" StepType="Start" Title="User Info">
<table cellpadding=0 cellspacing=0 width="100%">
 <tr>
     <td>
       First Name:
     </td>
     <td>
       <asp:TextBox ID="FirstName" runat="server"></asp:TextBox>
     </td>
     <td>
       Last Name:
     </td>
     <td>
        <asp:TextBox ID="LastName" runat="server"></asp:TextBox>
     </td>
 </tr>
 <tr>
     <td>
       Gender:
     </td>
     <td>
       <asp:DropDownList ID="Gender" runat="server">
         <asp:ListItem>Male</asp:ListItem>
         <asp:ListItem>Female</asp:ListItem>
       </asp:DropDownList>
     </td>
 </tr>
 <tr>
     <td>
       State:
     </td>
     <td>
      <asp:DropDownList ID="State" runat="server">
        <asp:ListItem>Andaman and Nicobar Islands</asp:ListItem>
        <asp:ListItem>Andhra Pradesh</asp:ListItem>
        <asp:ListItem>Arunachal Pradesh</asp:ListItem>
        <asp:ListItem>Assam</asp:ListItem>
        <asp:ListItem>Bihar</asp:ListItem>
        <asp:ListItem>Chandigarh</asp:ListItem>
        <asp:ListItem>Chattisgarh</asp:ListItem>
        <asp:ListItem>Dadra and Nagar Haveli</asp:ListItem>
        <asp:ListItem>Daman and Diu</asp:ListItem>
        <asp:ListItem>Delhi</asp:ListItem>
        <asp:ListItem>Goa</asp:ListItem>
        <asp:ListItem>Gujarat</asp:ListItem>
        <asp:ListItem>Haryana</asp:ListItem>
        <asp:ListItem>Himachal Pradesh</asp:ListItem>
        <asp:ListItem>Jammu and Kashmir</asp:ListItem>
        <asp:ListItem>Jharkhand</asp:ListItem>
        <asp:ListItem>Karnataka</asp:ListItem>
        <asp:ListItem>Kerala</asp:ListItem>
        <asp:ListItem>Lakshadweep</asp:ListItem>
        <asp:ListItem>Madhya Pradesh</asp:ListItem>
        <asp:ListItem>Maharashtra</asp:ListItem>
        <asp:ListItem>Manipur</asp:ListItem>
        <asp:ListItem>Meghalaya</asp:ListItem>
        <asp:ListItem>Mizoram</asp:ListItem>
        <asp:ListItem>Nagaland</asp:ListItem>
        <asp:ListItem>Orissa</asp:ListItem>
        <asp:ListItem>Pondicherry</asp:ListItem>
        <asp:ListItem>Punjab</asp:ListItem>
        <asp:ListItem>Rajasthan</asp:ListItem>
        <asp:ListItem>Sikkim</asp:ListItem>
        <asp:ListItem>Tamil Nadu</asp:ListItem>
        <asp:ListItem>Tripura</asp:ListItem>
        <asp:ListItem>Uttarakhand</asp:ListItem>
        <asp:ListItem>Uttaranchal</asp:ListItem>
        <asp:ListItem>Uttar Pradesh</asp:ListItem>
        <asp:ListItem>West Bengal</asp:ListItem>
      </asp:DropDownList>
    </td>
 </tr>
 <tr>
     <td>
       Pin Code:
     </td>
     <td>
       <asp:TextBox ID="PinCode" runat="server"></asp:TextBox>
     </td>
 </tr>
  <tr>
     <td>
        Alternate Email:
     </td>
     <td>
       <asp:TextBox ID="AltEmail" runat="server"></asp:TextBox>
     </td>
 </tr>
</table>
</asp:WizardStep>
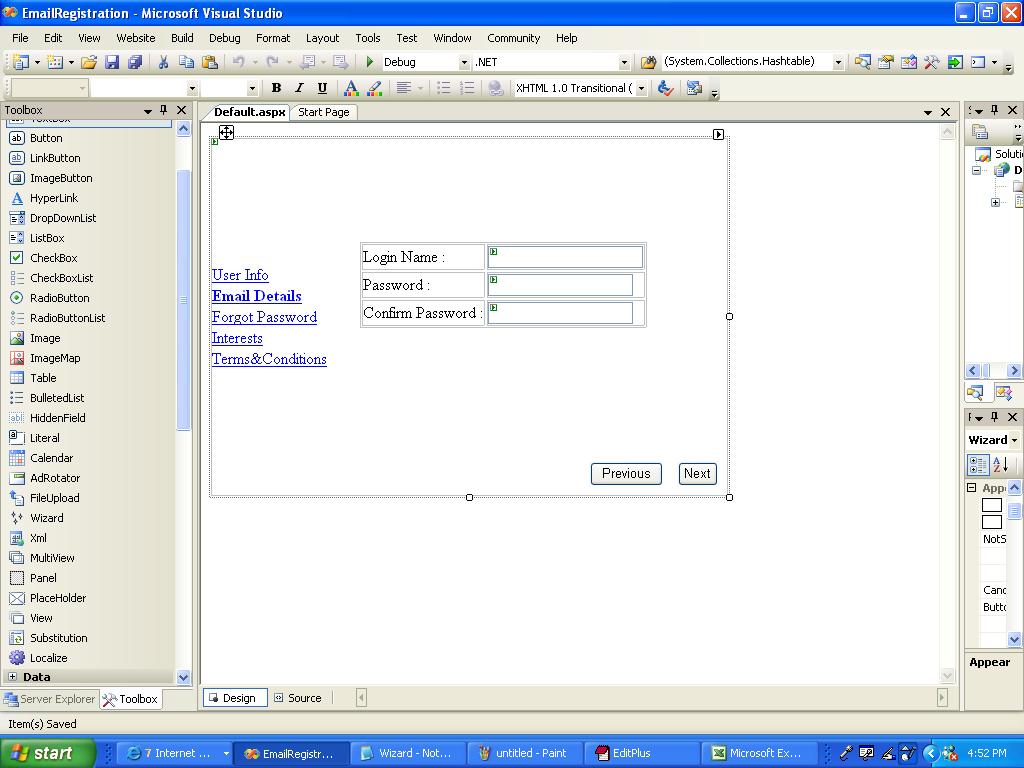
After adding the user info we will take the email details like Email Address, Password, and Confirm Password.
<asp:WizardStep runat="server" Title="Email Details">
<table>
 <tr>
     <td>
       Login Name:
     </td>
     <td>
        <asp:TextBox ID="LoginName" runat="server"></asp:TextBox>
     </td>
 </tr>
 <tr>
     <td>
         Password:
     </td>
     <td>
         <asp:TextBox ID="Password" runat="server" TextMode="Password">
</asp:TextBox>
     </td>
 </tr>
 <tr>
     <td>
        Confirm Password:
     </td>
     <td>
        <asp:TextBox ID="ConfirmPassword" runat="server" TextMode="Password">
        </asp:TextBox>
     </td>
 </tr>
</table>
</asp:WizardStep>
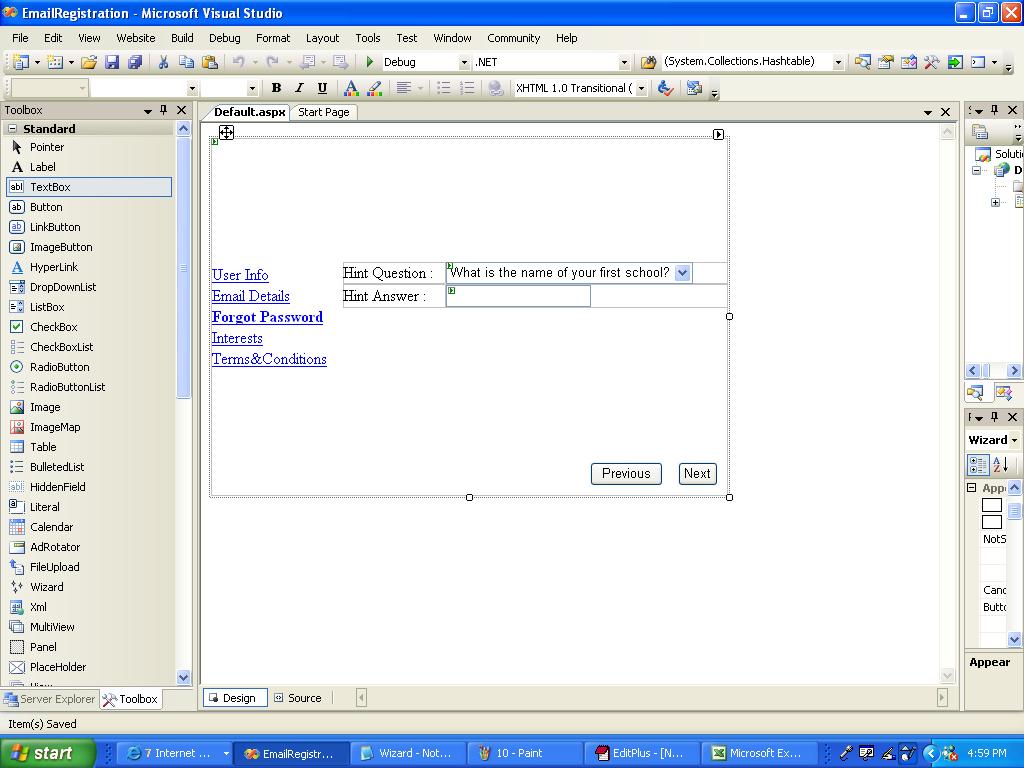
Similarly we will add controls for the last three steps.
Step 3
<asp:WizardStep runat="server" Title="Forgot Password">
<table cellpadding=0 cellspacing=0 width="100%">
 <tr>
     <td>
       Hint Question:
     </td>
     <td>
       <asp:DropDownList ID="HintQuestion" runat="server">
        <asp:ListItem>What is the name of your first school?</asp:ListItem>
        <asp:ListItem>What is your favourite pass-time?</asp:ListItem>
        <asp:ListItem>What is your mother's maiden name?</asp:ListItem>
        <asp:ListItem>What is your favourite food?</asp:ListItem>
        <asp:ListItem>What is your exact time of birth?</asp:ListItem>
       </asp:DropDownList>
     </td>
 </tr>
 <tr>
     <td>
      Hint Answer:
     </td>
     <td>
       <asp:TextBox ID="HintAnswer" runat="server" TextMode="Password"></asp:TextBox>
     </td>
 </tr>
</table>
</asp:WizardStep>
Step 4
<asp:WizardStep runat="server" Title="Interests">
<table cellpadding=0 cellspacing=0 width="100%">
<tr>
<td>
<asp:CheckBox ID="News" runat="server" Text="News"/>
</td>
<td>
<asp:CheckBox ID="HnF" runat="server" Text="Home & Family"/>
</td>
<td>
<asp:CheckBox ID="HnN" runat="server" Text="Health & Nutrition"/>
</td>
<td>
<asp:CheckBox ID="Auto" runat="server" Text="Automobiles"/>
</td>
</tr>
<tr>
<td>
<asp:CheckBox ID="Education" runat="server" Text="Education"/>
</td>
<td>
<asp:CheckBox ID="Loand" runat="server" Text="Loans"/>
</td>
<td>
<asp:CheckBox ID="Travel" runat="server" Text="Travel"/>
</td>
<td>
<asp:CheckBox ID="Computers" runat="server" Text="Computers"/>
</td>
</tr>
<tr>
<td>
<asp:CheckBox ID="Shopping" runat="server" Text="Shopping"/>
</td>
<td>
<asp:CheckBox ID="Insurance" runat="server" Text="Insurance"/>
</td>
<td>
<asp:CheckBox ID="Beauty" runat="server" Text="Beauty "/>
</td>
<td>
<asp:CheckBox ID="Fashion" runat="server" Text="Fashion"/>
</td>
</tr>
<tr>
<td>
<asp:CheckBox ID="Sports" runat="server" Text="Sports "/>
</td>
<td>
<asp:CheckBox ID="OnlineGames" runat="server" Text="Online Gaming"/>
</td>
<td>
<asp:CheckBox ID="SpecialOffers" runat="server" Text="Special Offers"/>
</td>
<td>
<asp:CheckBox ID="Family" runat="server" Text="Family"/>
</td>
</tr>
</table>
</asp:WizardStep>
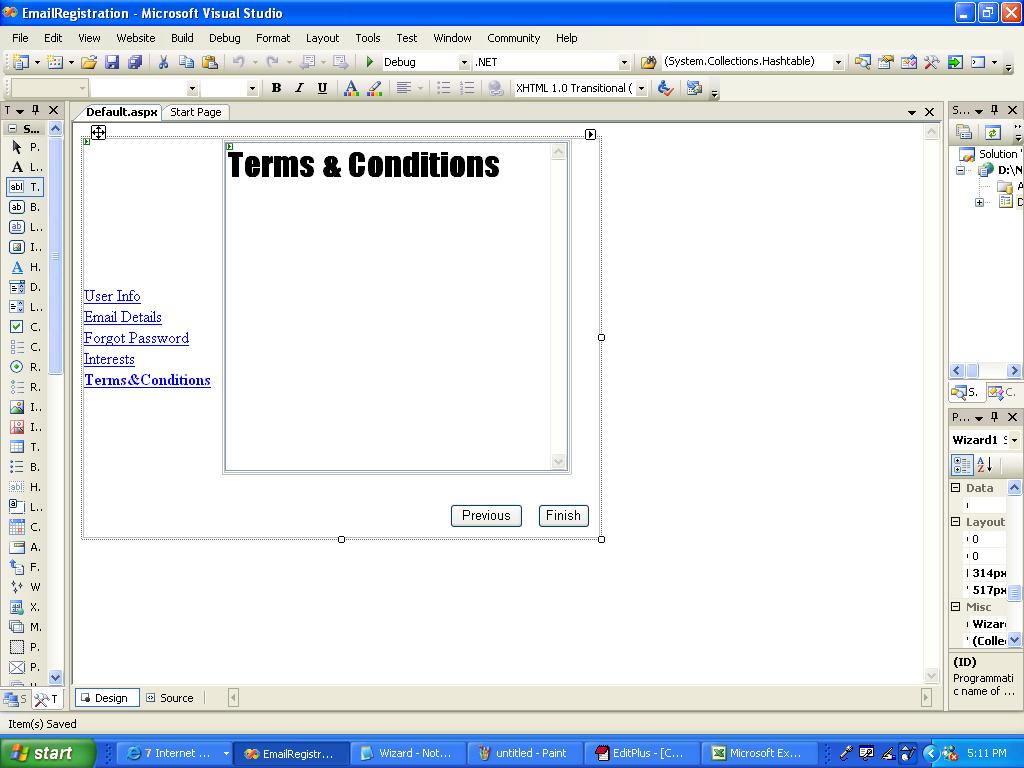
Step 5
<asp:WizardStep runat="server" StepType="Finish" Title="Terms&Conditions">
<table>
<tr>
<td style="height: 294px">
<asp:TextBox ID="TermsAndConditions" runat="server" TextMode="MultiLine"
Height="323px" Width="337px" Text="Terms & Conditions" Font-Bold="True"
Font-Names="Impact" Font-Size="XX-Large"></asp:TextBox>
</td>
</tr>
</table>
</asp:WizardStep>
After creating the wizard steps, let us now load the page and execute
all the steps of the wizard. You should be able to use the wizard
control without any code. Now let us add a few validators for FirstName
and Gender on the first step and for login name on the second step.
<asp:RequiredFieldValidator ID="FirstNameVal" runat="server" ErrorMessage="!"
ControlToValidate="FirstName"></asp:RequiredFieldValidator>
<asp:RequiredFieldValidator ID="GenderVal" runat="server" ErrorMessage="!"

ControlToValidate="Gender"></asp:RequiredFieldValidator>
<asp:RequiredFieldValidator ID="LoginVal" runat="server" ErrorMessage="!"

ControlToValidate="LoginName"></asp:RequiredFieldValidator>
I have added validators for the first and second step only you can
add them for all the steps. On execution you will notice that if the
first name is not keyed in and the Gender is not selected on clicking
the next button the wizard does not move forward. The same behaviour is
repeated if we click on "Next" without entering the LoginName. But the
validators don't fire if we click the "Previous" Button.
Similarly we can fill all the details of email registration. After
filling in all the details and clicking on the "Finish" button in the
last step. We must display a success message after saving the data
successfully. Let us assume that we have saved out data in the DB and
the registration was successful. Hence clicking on "Finish" we will
redirect the user to the "Message.aspx". Wizard control has a lot of
events like:
- ActiveStepChanged
- CancelButtonClick
- FinishButtonClick
- NextButtonClick
- PreviousButtonClick
- SideBarButtonClick
Let us trap the FinishButtonClick event and redirect to Message.aspx.
Let us add an another page called Message.aspx to the project. The
startup page of the project should be Default.aspx. In the Message.aspx
we will add the below code:
using System;
using System.Data;
using System.Configuration;
using System.Collections;
using System.Web;
using System.Web.Security;
using System.Web.UI;
using System.Web.UI.WebControls;
using System.Web.UI.WebControls.WebParts;
using System.Web.UI.HtmlControls;

public partial class Message:  System.Web.UI.Page
{
    protected void Page_Load(object sender, EventArgs e)
    {
        TextMessage.Text = Convert.ToString(this.Request.QueryString["FirstName"])
+ " has been successfully registered." ;
    }
}

In the Default.aspx we will add the below code for the FinishButtonClick event

    protected void EmailRegWizard_FinishButtonClick(
        object sender, WizardNavigationEventArgs e)
    {
        Response.Redirect("Message.aspx?FirstName=" + ((TextBox)

EmailRegWizard.WizardSteps[0].FindControl("FirstName")).Text);
    }
Let us execute on running the application. You should be redirected to Message.aspx on clicking the Finish Button.
No comments:
Post a Comment